Tutorial: Exporting and Downloading Calculated Data
Users can export data from the Control Chart XmR for Power BI into a file for further analysis or sharing. In this brief guide, we’ll walk you through the essential steps.
Try it yourself!
Here’s what you need to export and download calculated data from the Control Chart XmR:
– Enable the setting Allow downloads from custom visuals in the Admin Portal
– a Power BI report with your Dataset
– Build and Format the Control Chart XmR
– Save and Share
Enable Allow downloads from custom visuals in the Admin Portal
To manage Power BI visuals you must be a Global administrator or have been assigned the Fabric administrator role. Go to the Admin portal > Tenant settings, scroll down to Power BI visuals and enable Allow downloads from custom visuals. When this setting is enabled, users can download data from the Control Chart XmR into a file. It can export to files of the following types: .csv, .txt, .json, .tmplt, .xml, .pdf and .xlxs
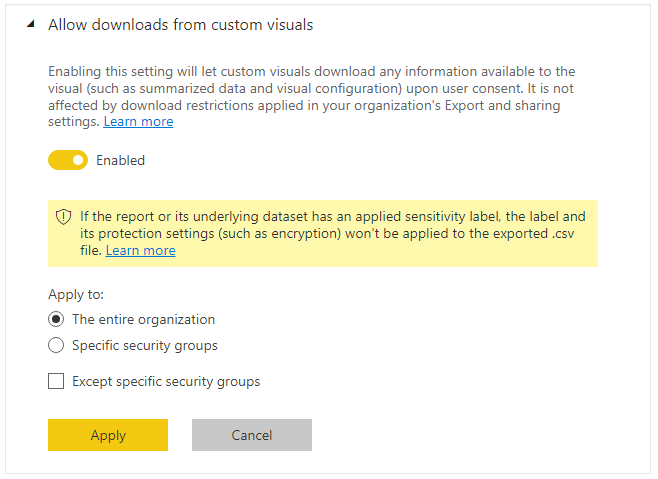
- Expand the Allow downloads from custom visuals settings.
- Select Enabled.
- Choose who can download files:
- Select The entire organization option to allow everyone in your organization to download data from a visual into a file.
- Select the Specific security groups option to limit downloading files to specific security groups. Enter the security groups you want in the Enter security groups text bar. The security groups you specify are included by default. If you want to exclude these security groups and include everyone else in the organization, select the Except specific security groups option.
- Select Apply.
The UI tenant settings only affect the Power BI service. If you want these settings to take effect in Power BI Desktop, use AD Group Policy.
| Key | Value name | Value |
|---|---|---|
| Software\Policies\Microsoft\Power BI Desktop\ | AllowCVToExportDataToFile | 0 – Disable 1 – Enable (Default) |
When AllowCVToExportDataToFile is set to 1, the custom visual can export data to a file only if:
- The feature switch in the admin portal is enabled.
- The user is logged on.
Enable Allow export data in the Control XmR Chart
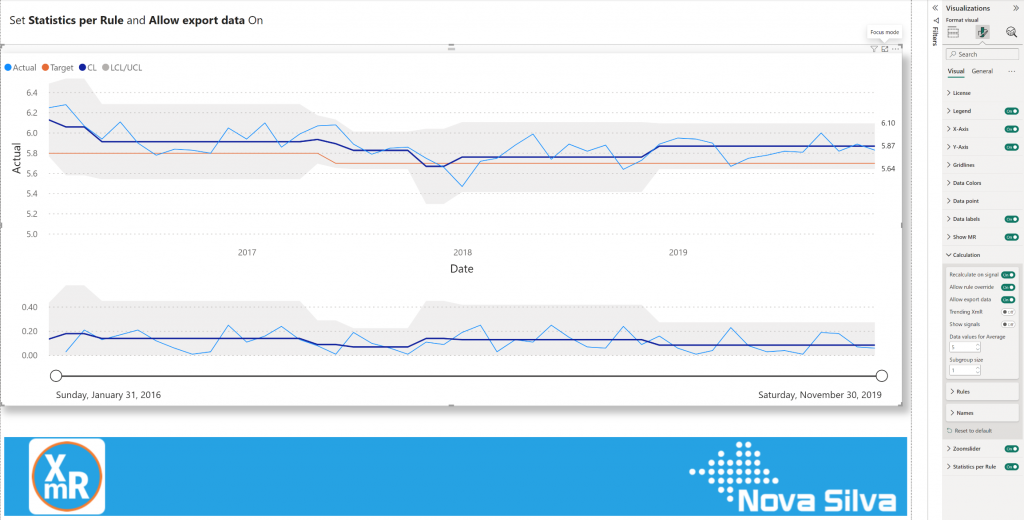
- Open your Power BI report and add a Control Chart XmR.
- Go to Format visual and enable Statistics per Rule.
- Expand the Calculation card and enable Allow export data.
- In the chart click Focus mode icon.
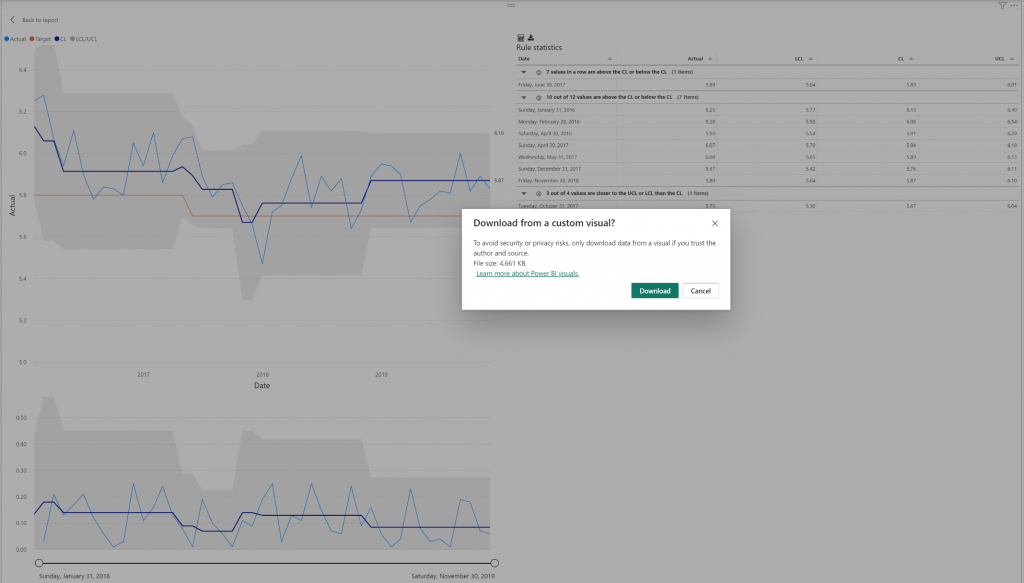
- Click the Download Data icon.
- The window Download from a custom visual? appears asking to confirm that the visual is from a trusted source.
- Click Download button.
- Rename and Save file.
- Open the file in Excel.
- Power BI exports the data to a (.csv) file. By default, your export is saved to your local Downloads folder.
Considerations and limitations
- Allow downloads from custom visuals setting must be enabled by your Power BI administrator.
- The API is supported only in the Power BI service and Power BI desktop.
- The size limit for a downloaded file is 30 MB.